Tutorial
Build a simple single-page application with Nue
In this tutorial, you’ll learn Nue's key features and benefits by building a fully-functioning single-page application (SPA), from zero to production.

Install Nue
First install Nue, if not installed yet:
# With Bun (recommended)
bun install --global nuekit

# With Node
pnpm install --global nuekit
Create a SPA landing page
Next, we create a folder for our app and add a landing page in there:
# create a folder for our app
mkdir admin-dashboard

# go to the directory
cd admin-dashboard

# add the page
echo '<app/>' > index.html
Well done! Your first Nue single-page application is ready 🍾🍾. You can start developing it with a plain nue command inside the project directory:
nueYou should now see an empty page at localhost:8080

HTML source
Let's view the results at view-source:http://localhost:8080/
<!DOCTYPE html>

<html lang="en-US" dir="ltr">
  <head>
    <meta charset="utf-8">
    <meta name="viewport" content="width=device-width,initial-scale=1">
    <script src="/@nue/hotreload.js" type="module"></script>
  </head>

  <body>
    <div is="app"></div>
  </body>
</html>
Nue generates a basic HTML skeleton, sets up hot-reloading, and inserts a Web Components compatible placeholder element in our reactive single-page app, called simply the "app".
Create a skeleton app
Next, we create something visible to work on by adding a file called app.nue with the following code:
<main ="app">
<header>
<h1>Nue admin dashboard</h1>
<p>Simple template for scaleable apps</p>
</header>
<table>
<tr :for="user in users">
<td>{ user.created }</td>
<td>{ user.email }</td>
<td>{ user.feedback }</td>
</tr>
</table>
<script>
users = [
{ email: 'john@acme.org', feedback: 'Looks good', created: '2023-11-20' },
{ email: 'jane@acme.org', feedback: 'Awesome!', created: '2023-11-19' },
]
</script>
</main>This simply renders an HTML table with two users but works as a good starting point for our reactive single-page application. We can now edit both of our files (index.html and app.nue) and the browser magically hot-reloads itself as we make changes.
NOTE: Hybrid apps consisting of both server- and client-side components are called isomorphic applications.
Add basic information
HTML pages don't have a "front matter" section so we put all the basic information to site.yaml:
# The document title
title: Nue admin dashboard

# Meta description
description: Simple template for scalable single-page apps

# Favicon
favicon: /img/nue-admin.svg
After saving the file the browser title will automatically update.
Next, we hand this data to our app component by modifying our index.html as follows:
<app :title :description/>This data can then be rendered on our app.nue component like this:
<h1>{ title }</h1>
<p>{ description }</p>
We need one manual reload to get the YAML data from the server (to be fixed), but after that, we can edit all our three files (index.html, app.nue, and site.yaml) and the application hot-reloads itself automatically.
Create a model
Next, we'll create a "business model" with TypeScript. This model is the back of the frontend on our MVC-based architecture. The purpose of the model is to separate view code from the business logic so that UX developers can focus on the UX development and JS developers can focus on the logic without knowing anything about the view:
Our model has three methods:
// file: model/index.ts
export default {

  async getFeedback(): Promise<any> {
    const resp = await fetch('/model/feedback.json')
    return await resp.json()
  },

  async getUsers(): Promise<any> {
    const resp = await fetch('/model/users.json')
    return await resp.json()
  },

  async getAnalytics(): Promise<any> {
    const resp = await fetch('/model/analytics.json')
    return await resp.json()
  }
}
When you save the model Nue converts our TypeScript file to JavaScript with Bun.build() or esbuild.build() under Node.
At this point, we use JSON mockup files, but the client is unaware of it because it operates with the model's public API methods without knowing the implementation details.
Here's what the return value of getFeedback() call looks like:
[
  {
    "created": "2023-11-19",
    "email": "lshellum0@theglobeandmail.com",
    "feedback": "Looks great"
  },
  ...
]
The model is kept as "dummy" as possible. It doesn't know anything about the view and is easy to make testable with the awesome Bun test runner. Later, when your model gets more complex it can be a separate repository and the methods will obviously be tied to authenticated server data.
Create views
Next, we create three reactive views with Nue's template syntax:
Users view
<table ="users-view">
<tr :for="user in users">
<td><avatar :src="user.avatar"/></td>
<td><email :addr="user.email"/></td>
<td><pretty-date :date="user.created"/></td>
</tr>
</table>Feedback View
<table ="feedback-view">
<tr :for="user in users">
<td><strong>{ user.name }</strong></td>
<td><email :addr="user.email"/><q>{ user.feedback }</q></td>
<td><pretty-date :date="user.created"/></td>
</tr>
</table>Analytics view
<section ="analytics-view">
<h2>Monthly svisitors</h2>
<bar-chart :data="visitors" class="main chart"/>
<h2>Monthly new leads</h2>
<bar-chart :data="leads" class="secondary chart"/>
<h2>Monthly active users</h2>
<bar-chart :data="users" class="secondary chart"/>
</section>Just like with the model, the goal here is similar: to keep the view layer as "dummy" as possible, unaware of the backend complexities like networking, authentication, and caching. They are accessible for UX developers who are experts on topics like accessibility, and interaction design.
Create a controller
Next, we turn our app.nue into a controller that sits between the model and our application views. It controls what views are shown and on what conditions, and ties the views with the model data. We use Nue's simple app router for the job:
<script>
// app router
import { router } from '/@nue/app-router.js'
// the model
import model from './model/index.js'
</script>
<!-- the controller -->
<main ="app">
<header>
<h1>{ title }</h1>
<p>{ description }</p>
</header>
<!-- navigation for our views (aka "pages" or "routes" )-->
<nav>
<a href="/">Users</a>
<a href="/feedback">Feedback</a>
<a href="/analytics">Analytics</a>
</nav>
<!-- placeholder for the views -->
<article id="container"/>
<!-- controller code -->
<script>
// setup things after the #container node is mounted
mounted() {
// front page -> show users view
router.on('/', async() => {
const users = await model.getUsers()
this.mountChild('users-view', container, { users })
})
// feedback page -> show feedback view
router.on('/feedback', async() => {
const users = await model.getFeedback()
this.mountChild('users-view', container, { users })
})
// analytics page -> show analytics view
router.on('/analytics', async() => {
const data = await model.getAnalytics()
this.mountChild('analytics-view', container, data)
})
// start routing & setup
router.start(this)
}
</script>
</main>Again, you can edit all the files and hot-reloading keeps working, even with the backend connection.
Add styling
Now it's a good time to add styling for our views. For that, we create a new folder "style" and add a bunch of CSS files in there. Then we turn it into a global folder so that all the styles are automatically included in our single-page app:
# file: site.yaml
globals: [style]
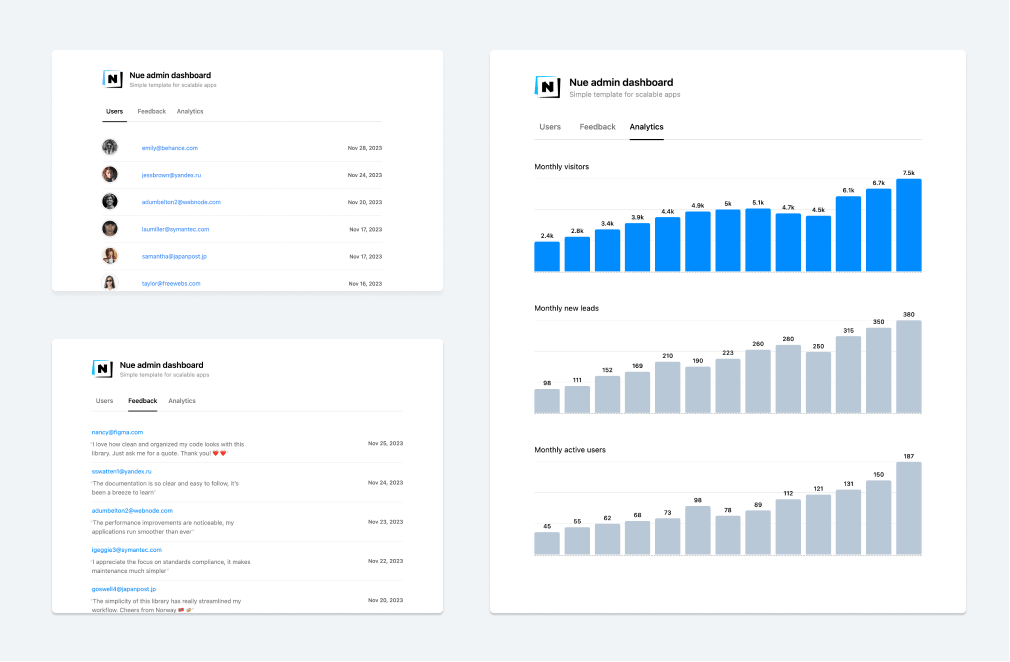
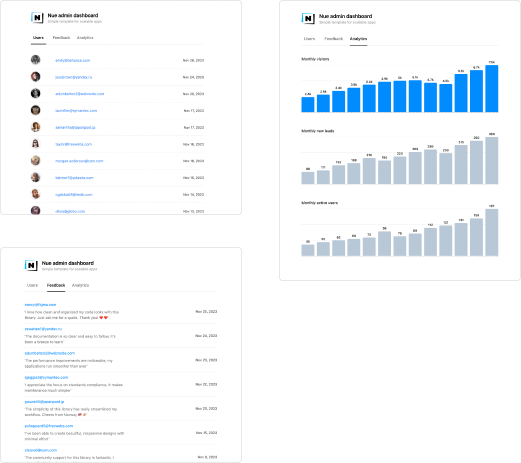
This change is detected by a hot-reloader and the app silently turns into a properly designed graphical user interface. Here's what we have now:

We could also implement alternate designs, like theme/brutalist, and update the globals option accordingly. Just to experience the beauty of semantic HTML.
Build for production
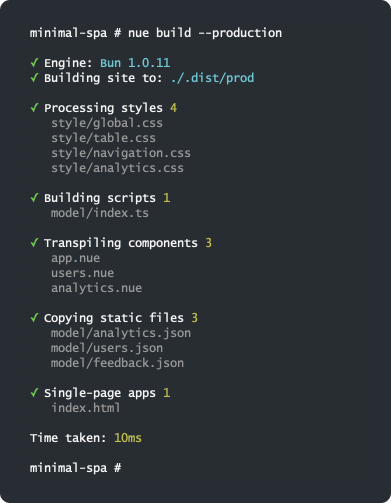
Let's build a production distributable with minified/bundled JS and CSS:

Done 👍: we now have a single-page application that is easy to scale and enjoyable to work with.
Next steps
Here is a slightly more advanced SPA example with 6,968 leads and 985 customers on the backend. There are searching and sorting possibilities and the client state is stored on the URL. The model features lazy-loading and client-side storage so that every operation is instant:
The Readme link on the top/right corner takes you away from the SPA to a normal multi-page application, and the app router is seamlessly switched to a page router. Hitting the browser's back and forward button toggles between the two routing methods.
Here is the demo and the source code for this more advanced example. For inspiration.
Enjoy!
 Nue status update