Tutorial
Build a simple blog with Nue
In this tutorial, you’ll see Nue's key features and benefits by building a fully functioning blog, from zero to production website.
Install Nue
First install Nue, if not installed yet:
# With Bun (recommended)
bun install --global nuekit

# With Node
pnpm install --global nuekit
Create your first page
Next, we create a folder for our blog and add a page in there:
# create a folder for our blog
mkdir simple-blog

# go to the directory
cd simple-blog

# create the first page
echo '# Hello, World!' > index.md
Congrats! Your first Nue application is ready 🍻🍻. You can start developing it with the nue command:
nueOpen http://localhost:8080/ with your browser and you'll see this:
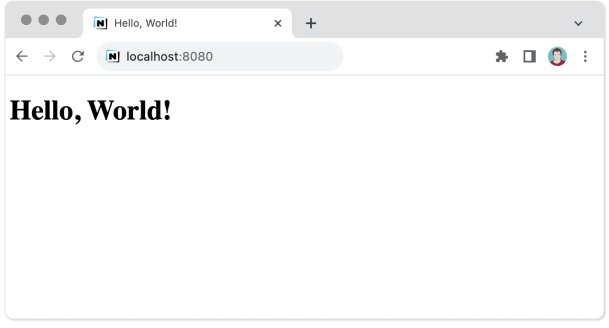
HTML source
Let's view the source code of that page at view-source:http://localhost:8080/
<!DOCTYPE html>

<html lang="en" dir="ltr">
  <head>
    <meta charset="utf-8">
    <title>Hello, World!</title>
    <meta name="viewport" content="width=device-width,initial-scale=1">
    <script src="/@nue/ıhotreload.jsı" type="module"></script>
  </head>

  <body>
    <h1>Hello, World!</h1>
  </body>
</html>
Nue auto-generates an HTML skeleton, with basic meta tags and the page title, which is automatically parsed from the Markdown content.
The nicest thing, however, is the "hotreload.js" module, which is the #1 reason to choose Nue as your web development environment. Let's see how it works.
Hot-reloading
Let's add a new file to our project folder called "blog.css", which will take care of the styling. Nue automatically adds the following line on the HTML without the need to reload your page:
<link href="/blog.css" rel="stylesheet">Now, as you edit either of your files (blog.css or index.md) on your text editor you can see the browser magically morphing with your changes.
// TODO: video: completing the page the first page
Instead of making a full reload, Nue uses a technique called DOM diffing to only update the parts on the page that have changed. Be it the content, metadata, styling, global headers and footers, page layouts, or reactive components.
Frontmatter
Next, we add some metadata for the page for SEO and social sharing purposes. We do this by adding a so-called "front matter" at the beginning of our Markdown page. This is a YAML-formatted section with human-readable key/value pairs:
--
 title: My first Nue page
 description: Fooling around with hot-reloading
 ---

 # Hello, World!
Again, as you edit the metadata you can see your page title change on the browser tab.
Complete the page
Then we add a folder called img to hold all our images and complete editing the content and styling until we are happy. And we can watch the page evolve on the browser from start to finish in a "What you see is what you get" (WYSIWYG) manner.
Add headers and footers
Next, we stop fooling around and turn our blog into something more serious. We start by adding headers and footers by creating a file called layout.html on the project root and editing it as follows:
<!-- global header -->
<header>
  <a href="/"><img :src="avatar"></a>
  <nav>
    <a :for="el in social" :href="el.url">
      <img class="icon" src="/img/{el.icon}.svg">
    </a>
  </nav>
</header>

<!-- global footer -->
<footer>
  <p>© { fullname } • { new Date().getFullYear() }</p>
  <q>{ slogan }</q>
</footer>
Add shared data
Then we add a data file called "site.yaml" with all the site-wide data to fill our personal information and other basic data being used on our header and footer:
# shared data for all pages
fullname: Emma Bennet
slogan: Less is More
avatar: /img/emma.jpg
favicon: /img/favicon.jpg


# the social icons on the header
social:
  - icon: email
    url: email:emma@bennet.co
    alt: Emma Bennet email address
  - icon: twitter
    url: //twitter.com/tipiirai
    alt: Twitter profile
  - icon: github
    url: //github.com/nuejs/
    alt: Github projects
You can see your page headers and footers update on your browser as you edit the layout or the data file. The header and footer are inherited from the root level layout.html
Add page layout
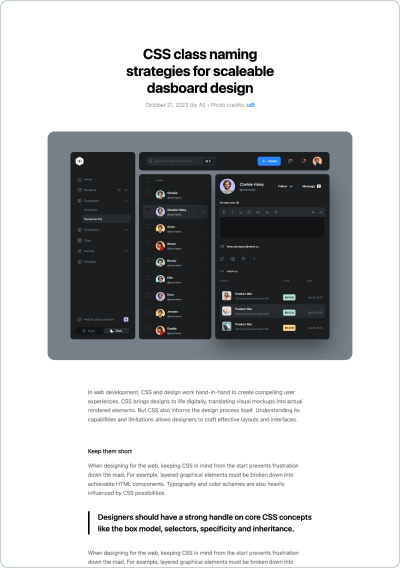
Next, we add a main element to our layout file to render the "hero" area for our blog entries. This will render data from the Markdown pages (front matter area) and if not present, then the data is taken from the site.yaml file.
<!-- in layout.html: -->
<main>

  <h1>{ title }</h1>

  <p>
    <pretty-date :date/> (by AI) •
    Photo credits: <a href="//dribbble.com/{ credits }">{ credits }</a>
  </p>

  <img class="hero" :src="hero" width="1000" height="800" alt="Hero image for { title }">

  <article>

    <!-- slot for the Markdown content -->
    ı<slot for="content"/>ı

  </article>

</main>
Add all the pages
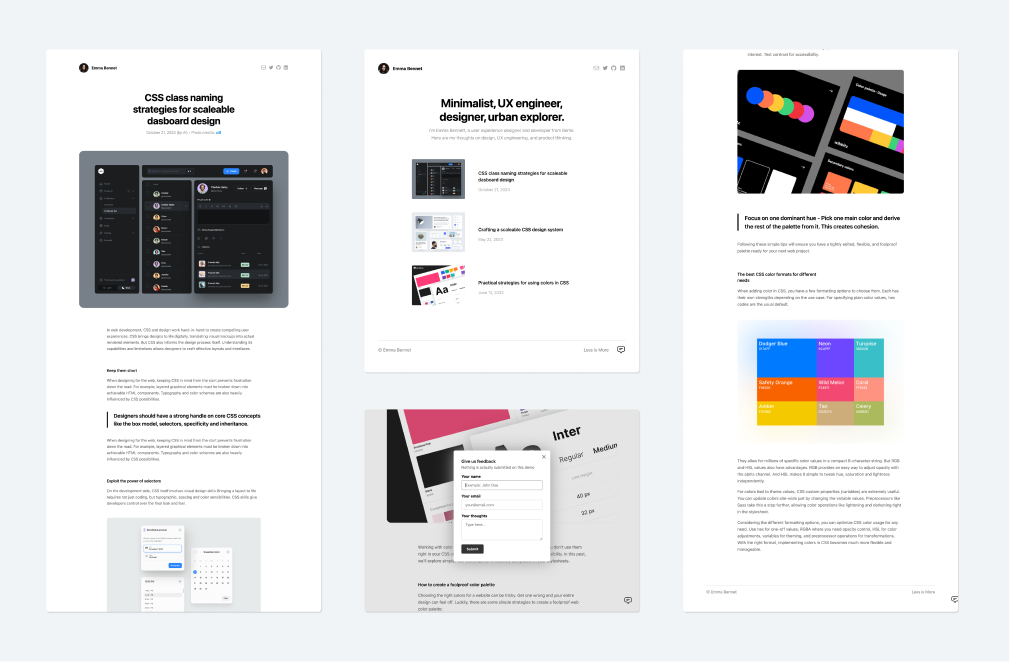
Next, we add two more pages to the directory. Each one will share the same header, footer, page layout, and styling. Here's what we have at this point:
Pretty good. Of course, hot-reloading was there to provide a great content authoring and styling experience for all the pages.
Create blog index
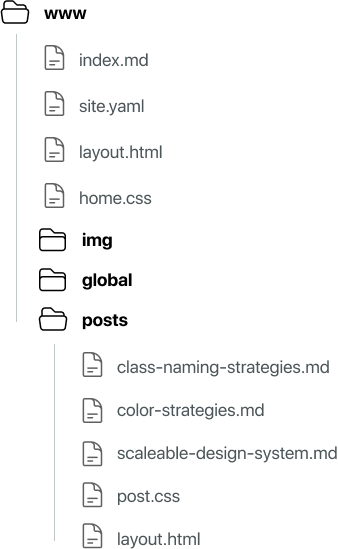
Next, we move all our pages to the "posts" folder to make room for our new front page, which lists all our entries from newest to latest. Nue treats the "posts" directory as a separate multi-page application that can be configured with its layout and styling.
We also added a new "global" folder to hold all our global components and stylesheets. The root directory has assets for the front page only, and the posts directory has assets for our blog entries only. Here's what our folder structure looks like:
Here's our new front page/index.md:
---
title: Emma Bennet Blog
description: Writing on design, UX engineering, minimalism, and product thinking
content_collection: ıpostsı
---
I’m Emma Bennett, a user experience designer and developer from Berlin. Here are my thoughts on design, UX engineering, and product thinking.The page is configured with a new content collection option to hold information on all our pages on the posts- folder. We use this information to render the posts on our updated layout.html file:
<!-- front page main layout -->
<main>
<!-- slot for the Markdown content -->
<slot for="content"/>
<!-- list of blog posts by looping the "posts" variable -->
<a :for="post in ıpostsı" :href="post.url">
<img src="{ post.dir }/{ post.hero }">
<aside>
<h2>{ post.title }</h2>
<p>{ post.pubDate }</p>
</aside>
</a>
</main>
<!-- headers and footers like before -->
<header>
...
</header>
<footer>
...
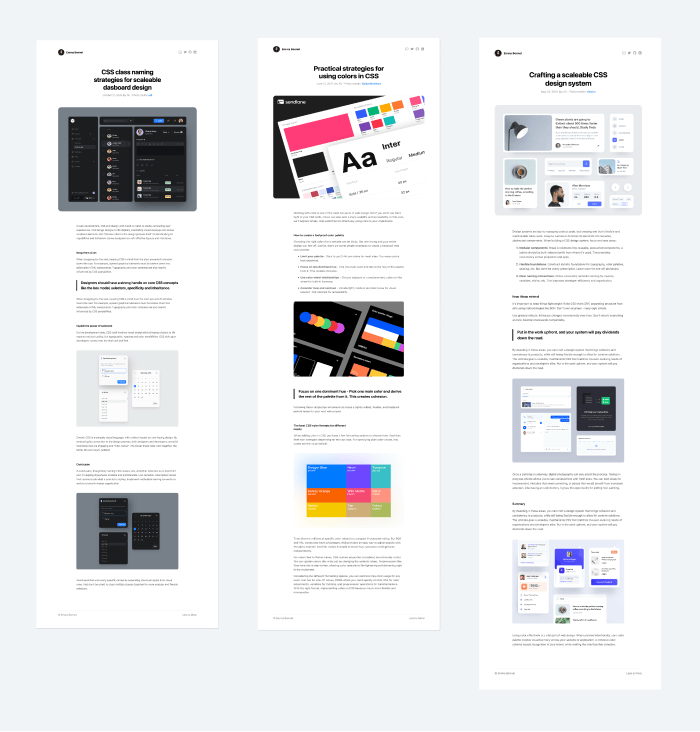
</footer>And here's our resulting blog index page:

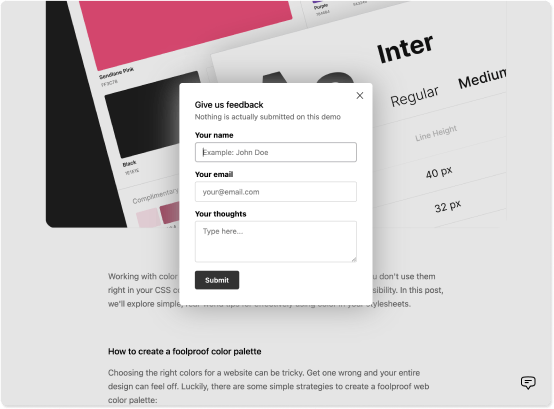
Add a reactive "island"
Next, we add an interactive feedback component that can be opened from a chat icon on the bottom/right corner of the page.
Interactive components are created with the same kind of HTML-based template language that is used for defining the server-side layouts:
<!-- file: feedback.nue -->
<dialog ="feedback-dialog">
<a class="close" ="root.close()">×</a>
<div :if="thanks" class="thanks">
<h2>Thank you!</h2>
</div>
<form .prevent="submit" :else>
<h2>Give us feedback</h2>
<div>
<h3>Your name</h3>
<input type="text" name="name" placeholder="Example: John Doe" required>
</div>
<div>
<h3>Your email</h3>
<input type="email" name="email" placeholder="your@email.com" required>
</div>
<div>
<h3>Your thoughts</h3>
<textarea name="feedback" placeholder="Type here..."/>
</div>
<button>Submit</button>
</form>
<script>
submit({ target }) {
this.thanks = true
}
</script>
</dialog>Add dialog launcher
Then we add the component to the footer and add a trigger element that opens up the dialog:
<!-- file: ./layout.html -->

<footer>
  <a href="/">© { fullname }</a>
  <strong>{ slogan }</strong>

  <!-- feedback dialog is automatically mounted here -->
  <feedback-dialog id="feedback"/>

  <!-- feedback launcher using the native .showModal() method -->
  <img src="/img/feedback.svg" onclick="feedback.showModal()">
</footer>
Needless to say, that hot-reloading facility is there again to speed up development. The dialog is not only updating live, but also the potential form values are retained and the dialog remains open while we make changes.
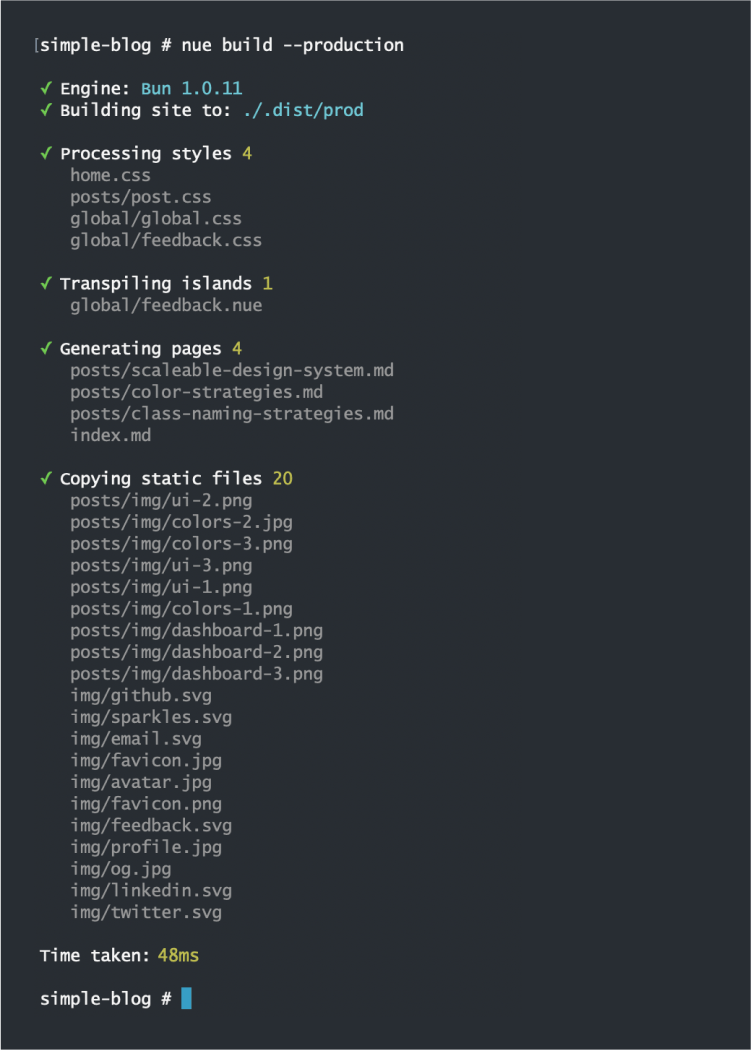
Build for production
Our blog is now ready. It's time to build a minified production version:
We can also preview the production version at http://localhost:8081
nue serve --productionYou can now push the production version at .dist/prod to some public server. You currently need to do this manually before the official deployment tool and Nue Cloud is available.